Last month I learned how to make tamales from an Ecuadorean woman in my ward. She has been cooking since she was five years old, and her enthusiasm for making food is infectious. She says that tamales are often made as a dish for a special occasion, such as Christmas, because they can be time consuming to make, therefore special.
This weekend I came home for Christmas and made tamales for my family. They are not hard to make, and so delicious and healthy! The filling can be modified to any taste--mine are not very spicy, for example, but yours could be full of chili peppers if you'd like.
Ingredients for the Tamale Filling:
4 tablespoons achiote oil (or you can dissolve achiote powder into hot oil, and its pretty much the same thing)
2 small onions or a bunch of scallions cut small
1 box or small bag of frozen peas and carrots
2 or 3 cooked and shredded chicken breasts (boiling them is quick & easy, or use leftover chicken)
2 or 3 hard-boiled eggs cut small
1 handful chopped fresh cilantro
2 minced garlic cloves
1 cup chicken broth
black olives sliced small (not quite a whole can)
salt and pepper to taste
The tamale filling can be made the night before. Heat the oil in a large skillet and saute the onions, garlic, cilantro, and olives until they are soft and hot but not yet beginning to brown. Add the chicken meat and stir well. Add the chicken stock, bring to a boil, then reduce the heat to a rapid simmer and add salt and pepper to taste. Add the peas and carrots and eggs, and mix well. Simmer for a few minutes then remove from heat and either set aside or refrigerate until later.
Ingredients for Tamale Masa:
3 cups masa harina (or any instant corn flour masa)
2 tsp baking powder
2 tsp salt
2 tsp ground cumin
1 cup softened butter
2 cups chicken broth or water
corn husks
Rinse off the corn husks and place them in a deep pan or pot. Pour boiling water over them and let them soak for about 15 minutes or until soft and pliable, while you make the masa dough. Mix the masa, baking powder, salt, and cumin together, then add the butter and broth and mix (best done with hands) until soft, pliable, and fully combined.
Prepare the Tamales:
Prepare a pot with a steamer in the bottom and a few inches of water (if you don't have a steamer you can use a foil pie pan with holes cut in the bottom and placed upside down in the bottom of the pan) and cover the steamer with a few of the soaked corn husks. Drain and pat dry the corn husks. Take one and spread it out, and place about 2 tablespoons of masa dough in the middle of it. Using the corn husk, roll the dough into a tamale shape and then put a large spoonful of the chicken filling on top of the dough. Fold one side of the corn husk over, then fold the bottom up, then fold the other side over, and then the top. Place the wrapped tamales in the steamer and when the pot is full cover them with a cotton dishtowel and a lid, and steam for 45 minutes. (You might need to add some more water after about 30 minutes.)
To eat the tamales, just unwrap carefully (the steam is hot!) on a plate, and enjoy!
The recipe makes about 25 tamales, and a good portion is 2 medium sized tamales per person.
(Sorry, I should have taken step-by-step pictures of the process and finished product, but I was so excited about making and eating them that I entirely forgot.)
Monday, December 28, 2009
Tuesday, December 15, 2009
Cheesecake or Pie?
Julianne's Apple Cinnamon Cheese Pie
I have made several cheesecakes now, and I find it interesting that they all have slightly different amounts of ingredients and different ways to cook it. I decided to make up my own recipe and see how it turns out. From the sounds of it, you can change a lot with a cheesecake, and it will still turn out good. This one is more of a cheesecake pie, hence the name "Cheese Pie".
Ingredients:
- 9 inch graham cracker crust
- 8 oz cream cheese
- 1/4 cup brown sugar, packed
- 1/4 cup heavy cream
- 1/4 cup sour cream
- 1/4 cup apple cider
- 1 tsp vanilla
- 1 egg
- 1/2 tsp cinnamon
- 1 large apple or 2 small apples peeled and sliced thinly
- 1/2 tsp cinnamon
- 1/2 tbsp butter
- 1 tsp lemon juice (leave out if you use granny smith apples)
Directions:
- Prepare a graham cracker crust or use pre-made graham cracker crust. Preheat oven to 350 F.
- Beat softened cream cheese until smooth (this is important if you like your cheesecake smooth). Add brown sugar and beat until smooth. Add heavy cream, sour cream, apple cider, and vanilla.
- In medium saucepan, saute apples with butter cinnamon and lemon juice until softened (medium to medium-low heat).
- Beat egg in separate bowl. Add to cream cheese mixture and mix until consistency is even. Poor half of mixture into pie pan. Add apples in one layer (two if necessary). Poor rest of mixture into bowl. Optional: I saved about 1/4 cup of the mixture and added 1/2 tsp cinnamon. I then added this in drops/ swirls over top and used knife to create a marble effect. You can just add the cinnamon ahead of time if you prefer.
- Put pie pan in large pan filled with about 1 inch of water (optional). Place in oven and bake for 30 minutes. Turn off oven and leave in oven for 30 minutes. Remove from oven, and let pie cool to room temperature. (All of this helps prevent cracking.)
- Refrigerate several hours or over night. Enjoy!
Fire-roasted Tomato Vegetable Soup
From November's Dining In (but also perfect for right now):
Allyson's Fire-Roasted Tomato Vegetable Soup
1 medium onion, chopped
3 stalks celery, chopped
4 carrots, peeled and roughly chopped
5 garlic cloves
2 (14 1/2 oz.) cans diced fire roasted tomatoes
1 (14 1/2 oz.) can fire roasted tomatoes, crushed
3 c. vegetable broth
1 T. oregano
1 tsp. rosemary, crushed between your fingers
4 roasted garlic cloves
1 T. minced parsley or chopped basil
salt and pepper
1 tsp. sugar (if needed)
Preheat oven to 350. In a shallow roasting pan, combine the celery, carrots, and garlic, sprinkle with salt, and lightly drizzle with olive oil. Cover the pan with foil and roast 45 minutes to hour, until the celery is almost tender, stirring every 15 minutes to prevent burning. Set aside.
In a large saucepan, sauté the onion over medium heat, until translucent. Add the roasted vegetables, tomatoes, broth, oregano, and rosemary; bring to a simmer. Simmer on very low heat for 10 minutes.
Use a blender to puree the soup to preferred level of consistency, then transfer back to the liquid. Add the parsley and salt and pepper to taste, and simmer for about 10 more minutes to allow the flavors to blend. If it is too acidic, add a little sugar to taste. Serve with some chopped fresh basil and either a crusty baguette or rye chips.
Tuesday, November 17, 2009
Cinnamon Roll Season
My mother is a big fan of traditions, especially when it comes to food. One of my favorites is her propensity for making cinnamon rolls every November. Now, there's nothing wrong with making cinnamon rolls any time of year, but there is something about November, when the air is cool and crisp and kids come home from school with rosy cheeks and big appetites to find mom pulling a fresh batch of hot cinnamon rolls out of the oven. Cold autumn days and kids and cinnamon rolls go together naturally, so in my family we only make cinnamon rolls when it's perfect, when it's November.
Mom's Cinnamon Rolls:
1/4 cup warm water
1 Tbsp dry yeast
1/4 cup lukewarm milk
1/4 cup sugar
1 tsp salt
1 egg
1/4 cup shortening
2 1/2 cups flour
Raisins (optional)
Glaze:
butter or margarine
1 tsp. vanilla
2 cups powdered sugar
hot water
Combine the water and the yeast, then combine all ingredients. Stir well until ball forms, then knead for 5 minutes. Let rise till double. Roll dough into an oblong shape about 15 X 9 inches. Spread with melted butter and sprinkle with cinnamon and sugar - liberally! Add raisins if you wish. Roll up tightly, seal edges, cover and let rest for 20 minutes. Then, cut rolls in 1 inch slices, place in greased 13X9 cake pan, not touching each other, and let rise until double. Bake at 375 for 20-25 minutes until golden.
Frost with the glaze, then eat 'em while they're hot!
Saturday, October 31, 2009
Shaking up dining in
So, for November's Dining In, I wanted to try something different. We have routinely had only about 8-12 show for a Dining In, so I thought we could do something like this (If we have more interest, we'll add another main dish and a little more of everything):
Fall Food is the theme
Assignments:
Drinks (1 person):
- BRu - Blueberry Limeade
Appetizers (2 spots left):
- ALDyer - Fire Roasted Tomato Vegetable Soup
Salads (1 spot left)
- Zahra - Apple, Pomegranate goodness
Sides (2 spots left)
- TRu - Garlic Bread
Main Dish (1 spot left)
- Lindy - Lasangna
Dessert (1 spot left)
- Julianne - Pumpkin Chiffon Pie
We'll meet at the Jumanji House at 7pm on Saturday, November 14th. Please let me know what you will bring in the comments, and I will update the post as we get more people. Please also bring your recipe, and we will post it here. Please RSVP by Friday, November 13. We can always add more items, but I want to make sure we have all the first bases covered.
If you would be willing to host one of these dinner groups, please let me know, and we will start a rotating schedule of themes and dishes. Thanks!
ETA: Thanks to all who came! I thought dinner was perfect! I cannot wait for the recipes.
Friday, October 30, 2009
A true Carolina Shrimp Boil

For my birthday this year, my cousin came to visit. Part of showing her the true North Carolina experience, we decided a Shrimp Boil (pronounced Shrimp Boll) was in order. Mixing potatoes, corn, and sausage from Saturday's Farmers' Market and fresh from the coast shrimp from Fishmongers (and newspapers pilfered from my work recycle bin), we truly made a heavenly night of it.
To have a great shrimp boil you will need:
- Newspaper (they make clean up shockingly easy)
- Old Bay Seasoning
- Lemon (lots!)
- An instructional on deveining shrimp (optional)
And the following:
Ingredients
- 4 quarts water (16 cups)
- 1 can (12 ounces) beer (optional)
- 1/2 cup OLD BAY® Seasoning
- 2 tablespoons salt
- 8 medium red potatoes, quartered
- 2 large onions, cut into wedges
- 2 pounds lean smoked sausage, cut into 2-inch pieces
- 8 ears fresh corn, shucked and halved crosswise
- 4 pounds unpeeled jumbo shrimp (21 to 25 count)
Directions
1. Bring water, beer, OLD BAY Seasoning and salt to boil in 12-quart stockpot on high heat. Add potatoes and onions. Cook 8 minutes. Add smoked sausage. Cook 5 minutes. Add corn. Cook 7 minutes.
2. Stir in shrimp. Cook 4 minutes or just until shrimp turn pink.
3. Drain cooking liquid. Pour contents of pot into large serving bowl or platter. Or, mound on paper-covered table. Sprinkle with additional OLD BAY Seasoning, if desired.
Ashley's Special Cocktail Sauce
Spoon full’s of:
- Cocktail sauce
- Mayo
- Mustard
- Horseradish sauce
- Ketchup
More cocktail and horseradish than the others. But just taste it and add more of
what you want as you go along. Enjoy--and so will your guests, people raved!
If you want to be daring, feel free to add another take on the shrimp boil, by getting a little steamy.
Ingredients
- 1/2 cup cider vinegar or beer (again, I did the cider vinegar)
- 1/2 cup water
- 2 tablespoons OLD BAY® Seasoning
- 1 pound large shrimp, peeled and deveined, leaving tails on
- 1 cup OLD BAY® Cocktail Sauce (or make your own).
Directions
1. In a medium saucepan, mix vinegar, water and OLD BAY. Bring to boil on medium heat. Gently stir in shrimp, then cover.
2. Steam 2 to 3 minutes or just until shrimp turn pink. Drain well.
3. Serve immediately or refrigerate until hungry guests arrive. Best served with punchy cocktail sauce and lively conversation.
Garlic Butter
For a delicious shrimp dip, just serve up this delight. It is incredibly easy. Microwave one stick of butter for 14-30 second (or until melted). Mix in 1/4 tsp garlic powder until dissolved. Dip away.
If you want a fancy option as well (or if you know people who don't go for old bay), you can try these:
Olive Oil Poached Shrimp
Take your shrimp and lay them in a lipped baking sheet (a jelly roll pan will work). Drizzle with olive oil and a little parsley. Bake at 250 degrees for 15 minutes. Toss shrimp at the 15 minute mark to coat one more time. Bake 10 more minutes, or until they look right.
Prep and Cook Time: 30 minutes. Notes: If you are concerned about salmonella or bacteria in raw eggs, use 1/2 cup pasteurized whole eggs (available at some grocery stores) in place of the egg yolks. Yield: Makes 1 cup
Ingredients
- 1 cup loosely packed basil leaves
- 1/2 cup extra-virgin olive oil
- 1/2 cup canola oil
- 2 egg yolks (I used egg-beaters)
- 2 cloves garlic, minced
- 1/2 teaspoon each dried mustard, lemon juice, salt, and pepper
Preparation
1. Bring a large pot of salted water to boil. Dunk basil leaves into the boilin
g water for 20 seconds. Drain and squeeze out as
much excess water as possible.
2. In a blender, whirl blanched basil leaves with olive and canola oils. Empty into a measuring cup or small pitcher and reserve.
3. In a medium bowl, whisk together egg yolks, garlic, mustard, lemon juice, salt, and pepper.

4. Whisk in a drop of the basil oil; continue adding drops of oil, whisking until mixture thickens to a mayonnaise-like consistency. Continuing to whisk, pour in remaining basil oil in a very thin stream. Season with additional salt and pepper to taste.
If you are an overachiever, you do all three. Dump on the newspapers and go to town. Laugh, chat, eat, dip, savor, and sit back with a full heart and belly at the end. Enjoy your true Carolina Experience.
Thursday, October 29, 2009
Around the web in foodie posts: Halloween

Oh so fabulous foodie posts about All Hallows Eve. . .
- Some creepy treats. Shudder
- Pumpkin bread pudding? Oh yes!
- 30 minute Apple Turnovers. . .
- Using Halloween Candy--Smart(ies)!
- Vegan Marshmallows (Ghosts, people, ghosts!)--watch the short at the end, cute!
- A cake-wrecks Halloween
- What fall looks like
- Recipe Zaar's list of Halloween snacks.
- B found these gorgeous Fall Leaf Tortilla chips--perfect with a ghoulish guacamole!
Have an eerie, entertaining, edible evening, my fellow ghouls and goblins!
Thursday, October 15, 2009
Around the Web in Foodie Posts: September & October
Here is the long list of foodie posts I've enjoyed lately--
September:
- That fabulous salad j.bradley borrowed from Sitti
- A beautiful end of summer treat
- A Ravioli Thells will love
- Debating the Food Police--with possible upsetting consequences for foodies
- It's all about the presentation
- Basic Kitchen Tools
- Gorgeous Lemony Pastries that I haven't gotten up the courage to ruin (I struggle with pastry patience)
- A Top Chef Rundown (They are pretty on with their top four--those are mine)
- A feature on Vegetarian recipes (really just a glorified recipe list)
- CFM's market recipes page always tickles my fancy. . .
October:
- In honor of dining in: a crepe post
- A cool look at solar powered kitchens
- A fun twist on a birthday favorite
- Feminist Food-storage
- A plum tart (Kel is a friend and former-roommate who was a guinea pig in many of my college food experiments--she is very brave, and a great cook!)
- A 50-cent interview to prep you for the fair
- Halloween Party Food
- A way to prep your kitchen for the holiday season
- And though not a blog, it is very nice to mention that Guglehupf is now serving dinner on the weekends (I loved the Schnitzel and the Beef short ribs with potato dumplings, though the desserts were also amazing--try the apple tart--wow!)
Any posts that changed your world or helped you set new food goals? Tell us more!
Tuesday, October 13, 2009
Chicken Soup & Apples for K
Every so often my friend K will need a recipe, and I will get an email that allows me to be a superhero sans tights. But hey, why wouldn't you love a friend who puffs up your ego just a bit?
In September it was Chicken Soup (she loved the Mexican Lime Chicken Soup):
- http://busycooks.about.com/od/
chickensoupsandstews/Chicken_S oups_and_Stews_Recipes.htm - http://www.thecrockpotblog.
com/cheesy-chicken-soup/ - http://www.busymommy.us/
cooking/chicken/715-crock-pot- chicken-and-dumplings - http://www.thecrockpotblog.
com/stew-that-chicken-slow/ - http://www.thecrockpotblog.
com/oriental-noodle-chicken- soup/ - http://diningwithdebbie.
blogspot.com/2009/08/mexican- lime-chicken-soup-adapted-for. html - http://www.netwellness.org/
healthtopics/diabetes/ diabeticrecipes3.cfm
Today it was apples:
- Betty's Apple Crisp (I will admit that ever since I got my first red Betty my sophomore year of college, I hate being without her--she is my most consistent cooking instructor/buddy): http://www.bettycrocker.com/recipes.aspx/apple-crisp
- I know, don't look at the wallpaper, but it really is amazing for something from a chain restaurant: http://
recipecircus.com/recipes/ gijane/DESSERTS/Maggiano39s_ Warm_Apple_Crostata.html - I love a good apple pie that you don't need a pie plate for--have it with cinnamon or dulce de leche ice cream and you are set! http://www.foodnetwork.
com/recipes/ina-garten/apple- crostata-recipe/index.html - Southern Apple Pie: http://www.foodnetwork.
com/recipes/paula-deen/paula- deen-savannah-high-apple-pie- recipe/index.html - This is a bread, but boy is it tasty: http://www.
fostersmarket.com/recipes.php? recipe_id=47 - How can you go wrong with apple dumplings? http://allrecipes.
com/Recipe/Old-Fashioned- Apple-Dumplings/Detail.aspx - Or, see what you like (the apple salsa looks cool): http://allrecipes.com/
recipes/fruits-and-vegetables/ fruits/apples/top.aspx
What have you been dying for a recipe for? Should we have a "Dear Prudie"-like post that answers everyone's food dilemmas or recipe needs every month? It is definitely something to think about.
Monday, October 12, 2009
Foodie Favorites: Mashed Seasoned Cauliflower
I adore Jim's Famous BBQ in Chapel Hill. No one in the area has better ribs. Since I tracked them down when I first moved here; whenever I am in the mood for baby-back or St. Louis (pronounced Louie) cut ribs, succulent sides, and mouth-watering cobbler; I will make a few calls then make my (or our) way to Jim's. I have had everything from dry rub to Sweet and Saucy (just like me), and it is all fall-off-the-bone tender and smokey-barbecue goodness. Yum!
That being said, their best feature has always been their mashed seasoned cauliflower. Sadly, it has recently been a casualty of the recession. As my heart broke thinking of this lost treasure, I decided I had to send an email begging for the recipe.
I was blessed with the restaurant quantity recipe below. I am pretty sure I'll have to experiment to make sure a smaller portioned recipe works well, but I cannot wait!
Jim's Famous BBQ's to-die-for Mashed Seasoned Cauliflower
Ingredients
-5 Pounds of Cauliflower
-3 Tablespoons of Liquid Butter
-1 Tablespoon of Garlic Powder
-1 Teaspoon of Salt
-3 Tablespoons of Vegetable Broth
-Choice of Cheese (Optional)
Instruction
-Bring water to a boil.
-Rough chop the cauliflower.
-Put in the pot basket.
-Place basket in boiling water.
-Boil for 12 to 15 minutes (Or until it is soft).
-Remove from pot and place in hotel pan.
-Mash and add the remaining ingredients.
-Transfer to sheet pan and let cool.
Add a little cheddar on the top, and you have a beautifully luscious, but seemingly simple side for any meal--an easy non-carb substitute for mashed potatoes. My mouth is watering just thinking of it!
Tuesday, September 15, 2009
Telling your food story
I finally got around to watching the finale of Top Chef Masters last night. Out of 24 Chefs who have been in the industry for a long time and who have James Beard Awards, Michelin Stars, and have owned restaurants for years, it was down to three. Their final challenge, to create a four course meal that told their food story.
Course 1: Their first food memory.
Course 2: The first time they cooked something, and they knew they wanted to be a chef.
Course 3: The first restaurant they opened.
Course 4: Where they are now and where they are heading.
From making gnocchi with an Italian mother, to living over a Pastry shop in France, to taking 20 years to get the perfect black mole sauce, every moment was exquisite. My mouth watered the entire time. I would have killed to be at that table taking that journey with them. I loved the true artistry and passion each chef had for food.
So, now I have a challenge for you--write a post about it, post in the comments, send me an email as a guest post--whatever, but I want to know! You do not have to answer all of them.
Course 1: Your first food memory.
Course 2: The first time you cooked something and knew you loved to cook (or ate something and knew you loved food).
Course 3: The first time you had to cook something all by yourself (whether it turned out well or not).
Course 4: What you wish you could cook if you had the chance.
This may just be a dream menu, or maybe we'll have a dining in and you bring one of the above mentioned dishes. I just love the idea of food telling a story, starting relationships, and bringing people together who are passionate about life, love, and everything around them. What will your story be?
Monday, August 31, 2009
Nigella's Brownies
 This weekend I became a domestic goddess when I bought a cookbook by British baker Nigella Lawson and made these brownies for my party, to smashing success:
Brownies
1 2/3 c. soft unsalted butter (I used salted butter though, because I like things to be saltier than not)
13 ounces bittersweet chocolate (I used 8 oz. generic baking chocolate, a 3.5 oz. Ghirardelli 60% cacao bar, and a handful of milk chocolate chips)
6 large eggs
1 tbsp. vanilla extract
1 2/3 c. sugar
1 1/2 c. all-purpose flour
1 tsp. salt
1 1/3 c. chopped walnuts
Melt the butter and chocolate together in a large heavy-based pan. In another bowl beat the eggs with the vanilla and sugar. When the chocolate mixture has melted, let it cool a little and add the eggs and sugar, then sift in the flour and salt, and add the nuts last. Mix well, then scrape the batter into a 13 x 9 x 2 pan lined with foil (I put mine into individual cupcake papers in a muffin tin). Bake at 350 degrees for 25 minutes (20 for the muffin tin method) until the top is dry and pale but the inside is still gooey.
Nigella says you can try it with dried cherries instead of nuts, or with nothing at all. And normally I don't like nuts in my brownies, but these were divine. It's also heavenly to top them with chopped strawberries and some whipped cream or vanilla ice cream. Really, the possibilities are endless, and the recipe is so easy I might not even bother with brownie mixes ever again.
Sunday, August 30, 2009
White Lasagna
For some reason the idea of a white lasagna came to my mind one day, and I decided to make it. I'm not sure if it's my blood type diet which says that I'm supposed to avoid tomatoes or my recent desires to try making creative dinners that sparked my interest in this lasagna, but I think it turned out pretty good. I've never even eaten a white lasagna before let alone made one, but I definitely enjoyed both making and eating this one.

Disclaimer: When cooking, I don't really follow any recipes, so the measurements used here are all approximated.
Ingredients:
Directions:

Disclaimer: When cooking, I don't really follow any recipes, so the measurements used here are all approximated.
Ingredients:
- 6 tablespoons butter
- 6 tablespoons flour
- 3 cups milk
- 1 cup water
- seasoned salt (or just plain salt is fine)
- 1 cup chopped green onions
- 1 cup chopped spinach
- 1 egg
- 15 oz ricotta cheese
- 3/4 cup Parmesan cheese
- 1 tbsp basil
- 2 cloves minced garlic
- 1 zucchini
- 3/4 pound mozzarella cheese
- 1/4 pound mixed Italian cheese
- 1/4 cup parmesan cheese
- 1 package lasagna noodles (9 or 12 noodles)
Directions:
- Make a roux with the butter and flour. Here's how: Melt the butter over a medium heat. Add the flour. Stir over a medium heat for 5-10 minutes.
- Slowly add the milk and water. Stir constantly with whisk until thick (this may take awhile).
- Note: I never precook my lasagna noodles, so I add water to the sauce which will cook the noodles while the lasagna cooks in the oven.
- Add salt to taste. Add green onions and spinach to white sauce.
- In a small bowl, mix the egg, ricotta cheese (I didn't use the whole container.), 3/4 cup Parmesan cheese, garlic, and basil
- Note: I usually make a 4 layer lasagna with 12 noodles, but for some reason, the box I bought came with 10 1/2 noodles, so I just made a 3-layer lasagna this time. This recipe will explain the 3-layer version.
- In a 13x9 pan, pour a little bit of the white sauce mixture to coat the bottom of the pan. Place 3 noodles on the bottom. Spread half of the ricotta mixture onto the 3 noodles.
- Slice the zucchini into thin slices. Place one layer of zucchini in the pan. Sprinkle some mozzarella cheese over the zucchini. Top with a small layer of the sauce.
- Note: Be careful not to use too much sauce. You want to make sure you have plenty of sauce for the top layer! If you think you won't have enough sauce consider thinning the sauce with a little bit of water.
- Make another noodle-ricotta mixture-zucchini(use the rest)-mozzarella cheese-white sauce layer.
- Place the last three noodles on top and cover with the last of the white sauce. Top with 1/4 pound of the mixed Italian cheese mixture (you can substitute this with mozzarella if you prefer) and 1/4 cup of Parmesan cheese.
- Cover with aluminum foil and bake at 375 for 1 hour. Remove foil and bake another 15 minutes or until the cheese on top is slightly golden.
- Enjoy!
- I recommend trying more vegetables: broccoli, bell peppers, artichoke hearts, whatever sounds good to you.
Monday, August 24, 2009
Poor Girl's Pizza
 Since I'd procrastinated my grocery shopping as usual, on Sunday afternoon I opened the fridge to find nothing but a lonely tomato and a chunk of old feta cheese. What's a girl to do? Make pizza! There's always flour in my cupboard, usually a packet of yeast too, and some olive oil, and that's all you really need to make a good crust. Top your pizza with any old thing you have in the fridge (well, maybe not anything) and you've got an easy, cheap meal. My pizza recipe:
Combine 2 teaspoons dry yeast, 1 teaspoon sugar, 1/2 teaspoon salt, 1 tablespoon olive oil and 1/2 cup water in a bowl and set it aside for about ten minutes. Then, when it looks all bubbly, mix in 1 1/2 cups all-purpose flour, forming a ball of dough. Turn it onto a floured surface and knead it for about five minutes, until it is smooth and elastic. Coat it with a little oil or cooking spray and put it back in the bowl, covered, to rise until doubled in size (about a half hour).
When the dough has risen, stretch it out nice and round and flat onto a pizza pan coated with a small handful of cornmeal. Rub some olive oil all over it, then add your toppings. I used dried basil flakes (fresh basil would have been even better), tomato slices, and crumbled feta cheese. Salt and pepper it too, if desired. I like to salt the crust nice and good for sure.
Bake it for about 15 minutes in a 450 degree oven, or until the crust and the edges of the topping look toasty brown. Depends on how crunchy you like your pizza to be. Anyway, right when you take it out of the oven, rub butter onto the crust. Then slice it up and enjoy!
Friday, August 21, 2009
Mama's Sweet Salsa
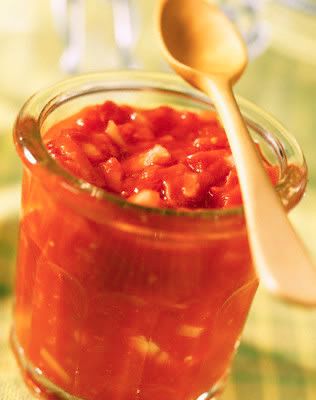
When I went home to Illinois, I helped Mama cut up some of her garden vegetables and together we watched the pot of salsa boil down. Mama spared 2 of her fresh jars and gave them to us. On Monday, I took the jar of salsa into work. My coworkers couldn't get enough of it and suggested even that Mama sell the product in stores. I won't charge you for it- but know that it is darn good- I even had to gaurd the office fridge.
Mama's Sweet Salsa (Makes about 8-9 pints)
19-20 tomatoes (Medium sized)
10 Chili Peppers/Green Preppers 3 Jalepeno Peppers
2 c onions or 2 large onions
1/2 c cilantro
1/2 c vinegar (apple or white, apple makes it sweeter)
5 cloves of garlic
1/2-1 c sugar (you can put more in if your peppers aren't that sweet)
salt & pepper to taste
add 2-3 stocks of celery if you like some crunch
chop all ingredients, vary sizes: if you like it chunky go for it- some people peel the tomatoes- mama leaves the skin on.
boil the mixture down till liquid is gone (about 1- 1.5 hours on medium heat, continue stirring)
pour into jars while hot, boil lids for 1 minute then place lids & rings on jars. place jars into water bath with 1"-1.5" of water above the jars. Boil the water 20-35 minutes (depending upon size of jars) Remove jars from water bath, let jars cool. (they should seal up at this point)
enjoy with fresh chips, in a breakfast burrito with some ranchero cheese, or best sprinkle on grilled fish.
Wednesday, August 12, 2009
Around the Web in Foodie Posts for the past couple of weeks
Sorry I have been on Hiatus, y'all. Travelling puts a crimp in my writing schedule. Luckily, a bunch of bloggers have been filling in the summer blanks:
- The FMHousewives have been talking gardens. Twice!
- The Mormon Foodie took on Salt and Sourdough Starter.
- Both B-Rad and Chou have been perfecting sauces.
- Lady Holiday & Ruby have been touring grocery stores.
- Ashes checked out Maine's Lobster Fest again (though it isn't quite ex-D3er Jen's Bratfest--though, to be honest, what is???).
- Slate talks about how food storage will help Mormon's survive an apocalypse, while the Deseret News' Mormon Times talks long term food storage.
- Finally, Top Chef Masters is crowning a winner & Top Chef: Las Vegas kicks off August 19th!
Do you have posts that you have especially enjoyed this summer?
Tuesday, August 11, 2009
Magic!!
Are you avoiding using your Crockpot because it's a pain to clean after you've been cooking the goodness for 8 plus hours??
Well... avoid no more! Crockpot clean up is a breeze now with Crockpot liners from Reynolds.
Here's some chili I cooked in the crockpot for over 10 hours.

This is what the Crockpot looked like after I took the liner out... I just had to wipe it out with a damp paper towel!!

Brilliant I tell you!! Brilliant!
Wednesday, July 29, 2009
In honor of Comic-Con

I didn't eat the best my four days in San Diego (I had a few pretzel dogs which are not as bad as you may think), but I did see a ton of people in costumes as various superheroes, minions, and monsters. So in honor of it, I would like to point you to these delightful creatures thought up by Chou.
Tuesday, July 28, 2009
Wednesday, July 15, 2009
Food Storage - How on earth?
The strength of the church welfare program lies in every family following the inspired direction of the church leaders to be self-sustaining through adequate preparation. God intends for his Saints to so prepare themselves "that the church [as the Lord has said] may stand independent above all other creatures beneath the celestial world." (D&C 78:14.) Ezra Taft Benson, "Prepare Ye," Ensign, Jan 1974, 68
A prophet commands it. So, how do we get started? You may not know it, but the new guidelines list a three-month supply (as well as a water supply and financial reserve) rather than the year-supply that my mother has, but always seems incredibly daunting to me. Leslie Probert on Mormon Times has some good ideas:
Plan 2 weeks of recipes, then double it (and you have a month). Then, come up with two more weeks, and double that. Finally, one more set of two weeks, and you have your final month--or any other grouping of meal plans.
It doesn't have to be all ramen, spam, and yellow death. With all the food available to us these days, you may be able to eat gourmet (though canned) food for three months. It is all about figuring out substitutions to your favorite recipes--but also recipes that can be done when you may or may not have electricity.
The problem with a lot of the old food storage guidelines was how to cook with 30 lbs. worth of wheat and no wheat grinder. You can only eat so much wheat chili (shudder--sorry, Mom). My favorite of her ideas is building a food storage cookbook--listing favorite recipes, and substituting in canned goods or food storage goods for it--And then having a booklet of 90 different days of recipes. This seems a little daunting, but I think we, as a foodie group could totally pull it off.
Is this something you may be interested in? Let me know in the comments, and I'll go to work gathering recipes from everyone.
Monday, July 13, 2009
The Carrboro Farmer's Market...again. Because I love it.
In keeping with tradition, B and I (and this time H came, too) went to the CFM on Saturday morning. Let me tell you, there are few things I am willing to get out of bed for, and this is one of them.
This week I left with:
Peaches-$5 a quart (about 7 peaches)
Fresh flowers-$1.25 a stem (they've already paid for themselves in happiness)
Every one should go. Everyone.
This week I left with:
Peaches-$5 a quart (about 7 peaches)
Fresh flowers-$1.25 a stem (they've already paid for themselves in happiness)
Every one should go. Everyone.
Saturday, July 11, 2009
Review: Fosters Market
I run an orientation that happens every other month for work. With work residing across from Panera on Franklin Street, you would think that they would be perfect for catering--and they were, but about a year to two years ago the service went downhill fast (I'm sure they are better now that I have complained, but I still have no desire to go back).
When they started to go South, I decided to check out Foster's as I had enjoyed them before and they deliver. Elana, the catering manager for the Chapel Hill store, is excellent. Whether I called the day before or a week before; whether I call to add to the order or cancel part of an order, she swings with the punches, and I don't think I'd order lunch with anyone else anymore. There is something to be said for great service. I even got a hand-written Christmas card this past December--I was impressed (maybe easily), but a hand-written card? That is kind of impressive (I know, I have ordered pre-printed cards for work).
I have tried a bunch of their stuff, and here are my favorites:
1. BLT Chicken Caesar wrap: The stuff dreams are made of. I like it hot or cold. I've even tried to recreate it, and it just isn't that amazing. With every bite, the crispness of the lettuce, the smokiness of the bacon, the creaminess of the Caesar dressing, and the tanginess of the Parmesan all mingle together in a perfect blend of flavor. I crave this sandwich for at least a week before and a week after orientation. So good.
2. The brown sugar cookies: I don't know what they put in these, but I am addicted. Sometimes they only put one in a cookie tray, and I snag it before anyone even knows it is there. A blend of the lighter sugar cookies you remember in all of your perfect Christmas memories, with a deeper caramelized flavor. They melt in your mouth, and you try to figure out excuses to get more (for others--really). I would share as a testament to their greatness, but then there wouldn't be enough for me.
3. The Spinach Mac & Cheese: Mouthwatering? Divine? I think the picture describes it best (even better, they also have the plain version and a spicy one with a kick of chipotle peppers).

4. Roasted Pork Loin with Foster's applesauce: a delicately roasted pork loin--juicy and succulent, the flavors seduce you into a perfect dizziness of taste and delight as the sweet and tart of the applesauce emphasize the flavor of the pork.
5. Hot Chocolate: A mix of Ghirardelli chocolate syrup and steamed milk, mixed together in a perfectly creamy, frothy concoction of loveliness. A perfect end to a lovely meal.
The website has some mouth-watering pictures (whomever their photographer is, he or she is very gifted with food), and I also love that they have Sara Foster's recipes available (for free!--though her cookbook is also amazing--though a little pricey at the store itself). The store also has a bunch of foodie lovers delights--imported chocolate, gourmet sauces, nifty cake & cupcake mixes, and 80s candy that I adore (pop rocks & fun dip!). They also serve smoothies, pies, various salads by the pound, platters for parties, and great breakfast & brunch options.
Maybe the Caesar dressing is the element I don't have right in the BLT Chicken Caesar. . . hmmm. Sorry, where was I? Ah, yes. We'll try out the Durham restaurant and store for July's dining out (easier parking than Chapel Hill) --Wednesday, July 29th, 7:30 pm. See you then!
Friday, July 10, 2009
Around the Web in Foodie Posts: the chocolate edition
Once more into the breach, my friends. . . .

- My trip to Hershey, PA

- All Chocolate - recipes, education, helpful tips
- The perfect brownie?
- The Barefoot Contessa's top 5 chocolate recipes
- Oh, and don't forget Chocolate the Exhibition (I'm hitting the tasting and class on the 15th!)--feel free to meet us there if you are interested!
We few. We happy few.
P.S. Though not chocolate related--check out Bravo's Site for Top Chef Masters, which I have truly been enjoying this year. Between the girl-scout food critics, the whiny French chef, a Lost-themed dinner, and Neil Patrick Harris, it definitely isn't horrible. I can't wait to see what is next!
Tuesday, July 7, 2009
Staying Creamy Cool

My Recipezaar Newsletter came today. I enjoy all the recipes and recipe suggestions they send, but today, the pictures were what sold me.
Don't you just want a drippy cone of something creamy? Go forth, and make ice cream!

Thursday, July 2, 2009
Red, White, and Blue!!
Who says the 4th of July can't be delectable!? While my personal favorite 4th of July food is Navajo Tacos made by real Navajo's... red, white, and blue is also a fun little challenge. So below, you'll find some colorful recipes you can use to celebrate this land of promise!!
About.com helps us out... with a bunch of yummy ideas!
Blueberry soup, salad, and dressing!
Recipe Zaar has few to offer...
A few more great ideas from Hugging Coast!
Enjoy perusing the sites... and links from those sites... we look forward to tasty treats at Break the Fast!!
Monday, June 22, 2009
Dining In[dian]
Hey D3 Diners In! Our Dining In[dian] Luncheon is coming up, and I suspect that some of us don't know roti from lassi yet, so I'm posting some information that will help you get started on the road to Indian cooking greatness.
Cooking Indian food can seem daunting at first because of the sheer number of ingredients and spices required, many of which you may never have heard of. You can get smaller amounts of spices at Weaver Street, which sells them by weight, and A Southern Season (because you WILL feel buyer's remorse if you buy a $15 bottle of cardamom powder). I have turmeric, cardamom pods, cumin seeds, a garam masala, fenugreek seeds, chili powder, amchoor powder, brown mustard seeds, gram flour, and a few others, if you'd like to borrow some for Dining In. Spices, vegetables, and other ingredients that are commonly used in Indian cooking are also sold at Asian food stores like the one next to Guglhopf or (obviously) the Indian grocery behind Target on 15-501.
I am also including some links to recipes of varying degrees of difficulty. And just remember, you can always just bring rice or naan (flat bread)!
(Disclaimer: I haven't tried any of these particular recipes, but I didn't want to put the recipes that I use up for fear of copyright infringement...)
Simple recipes: Channa Masala (curried chickpeas): http://vegetarian.about.com/od/vegetarianindianrecipes/r/quickchickpeas.htm; Mango Lassi (mango yogurt drink): http://www.youtube.com/watch?v=hLYcksxOgzM ; Indian Rice Pudding (http://www.foodnetwork.com/recipes/alton-brown/indian-rice-pudding-recipe/index.html)
Less simple recipes: Aloo Paratha (potato-stuffed flat bread): http://www.ivcooking.com/p269_75.php; Dal Makhani (lentils and kidney beans) http://www.sailusfood.com/2006/07/01/dal-makhani/; Tandoori chicken: http://www.foodnetwork.com/recipes/emeril-lagasse/grilled-tandoori-chicken-recipe/index.html
Bring it on: Vegetable Biryani: http://www.recipesindian.com/south_indian_recipes/rice/Vegetable-Biryani.html; Samosas: http://www.manjumalhi.co.uk/recipes/vegetarian/baked-samosas.html
Happy cooking! I can't wait to see what you all bring!
~R
Subscribe to:
Comments (Atom)